If you’re looking to update iTunes(Try it here) on your laptop, it’s important to stay up-to-date with the latest version to ensure that you have access to all of the program’s features and functionalities. Whether you’re using a Mac or a Windows PC, updating iTunes is a fairly straightforward process that can be accomplished in just a few simple steps. In this guide, we’ll walk you through the process of updating iTunes on your laptop, so you can keep your music library organized and your media files easily accessible.
Sure, I can guide you on how to update iTunes on your laptop. iTunes is a popular media player and library application developed by Apple Inc. It is used to manage and play music, videos, podcasts, and other multimedia content on various Apple devices such as iPhones, iPads, and iPods. Updating iTunes regularly ensures that you have access to the latest features, bug fixes, and security enhancements. Here’s a step-by-step guide on how to update iTunes on your laptop:
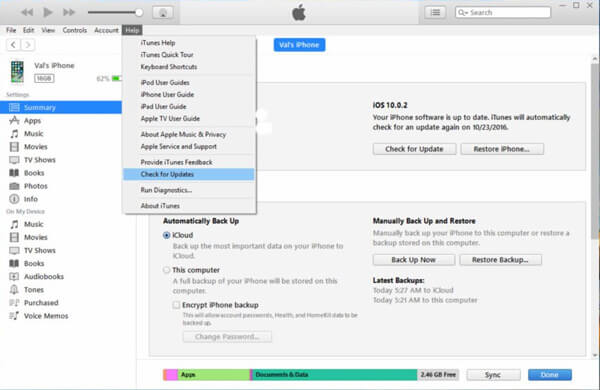
Step 1: Check your current version of iTunes
Before updating iTunes, it’s important to know which version of iTunes you’re currently running. To check this, launch iTunes on your laptop, click on the «Help» tab in the menu bar at the top of the screen, and select «About iTunes.» A pop-up window will appear displaying your current version of iTunes.
Step 2: Check for updates
The next step is to check if there are any available updates for iTunes. To do this, open the App Store on your laptop and click on the «Updates» tab in the toolbar. If there’s an available update for iTunes, you’ll see it listed here. Click on the «Update» button next to iTunes to begin the update process.
Step 3: Download and install the update
Once you’ve clicked on the «Update» button, the download and installation process will begin automatically. Depending on the size of the update, it may take several minutes to complete. During the installation process, you may be prompted to enter your Apple ID and password. Follow the on-screen instructions to complete the installation.
Step 4: Restart iTunes
After the installation process is complete, you’ll need to restart iTunes for the changes to take effect. Close the application and then reopen it to ensure that the update has been successfully installed.
In conclusion, updating iTunes on your laptop is a simple process that can be completed in just a few steps. Regularly updating the software ensures that you have access to the latest features and security enhancements, so it’s important to check for updates regularly. By following these steps, you’ll be able to keep your iTunes up-to-date and running smoothly on your laptop.